Newsy
Help

Overview

Why Newsy?

Feature walk-through

Your first site
Domain

Overview

Setting up via CNAME

Setting up via Cloudflare API

Setting up via Newsy

Enabling HTTPS

Example Walk-Through

GoDaddy Example

AWS Example

Accessing via sub-path

Email forwarding

Sending email from GMail
Contents

Categories

Contents via RSS feeds

Contents via keywords

Applying filters

Contents via API

Content Submission

Content via AI
Driving traffic

The Newsy Way

SEO

Membership

Newsletters
Integration

Verification

Auto Posting

Setting up Slack

Setting up Discord

Setting up Mastodon

Setting up Teams
Monetizing

Overview

Advertising platforms

Managing ads

Tackling Ad-Blockers

Selling your domain

Sponsored posts
Paid membership
Other options & settings

Analytics
Google Search Console

Inbox

Translation

Widgets

Private site
Sending email from GMail using your own domain
Back to Dashboard
If you have set up your email forwarding in Newsy
and your nominated email is a GMail address (or via G-Suite), then you can also configure it so that you can
send an email from your custom domain by following the instructions provided on this page.
- First, you need to have Gmail's Two-Factor Authentication enabled for this to work. Visit https://www.google.com/landing/2step/ if you do not have it enabled.
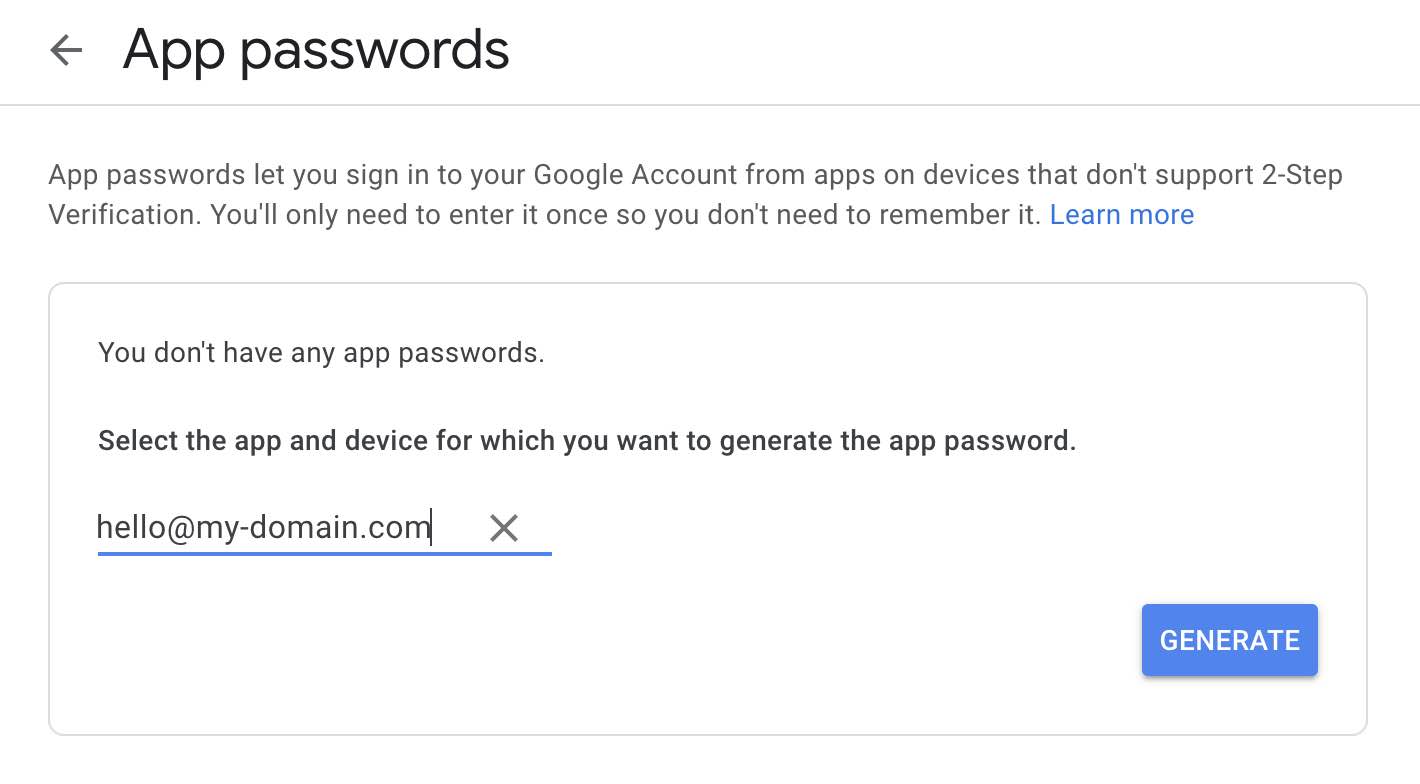
- Once Two-Factor Authentication is enabled (or if you already had it enabled), then visit https://myaccount.google.com/apppasswords.
-
When prompted for "Select the app and device you want to generate the app password for":
- Select "Mail" under the drop-down for "Select app"
- Select "Other" under the drop-down for "Select device"
-
When prompted for text input, enter your custom domain's email address you're forwarding from
(e.g. "hello@my-custom-domain.com" - this will help you keep track in case you use this service for multiple accounts)
-
Copy the password to your clipboard that is automatically generated
If you are using G Suite, visit your G Suite > Settings for Gmail > Advanced settings and make sure to check Allow users to send mail through an external SMTP server. There will be some delay for this change to be activated, so please wait a few minutes.
-
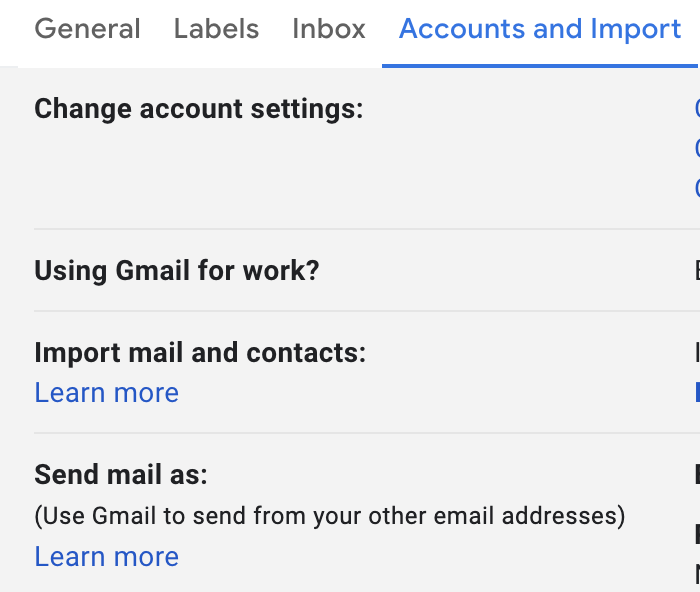
Go to Gmail and under Settings > Accounts and Import > Send mail as, click Add another email address
- When prompted for Name, enter the name that you want your email to be seen as From (e.g. "Elon Musk")
- When prompted for Email address, enter the email address with the custom domain you used above (e.g. hello@my-domain.com)
-
Uncheck Treat as an alias.
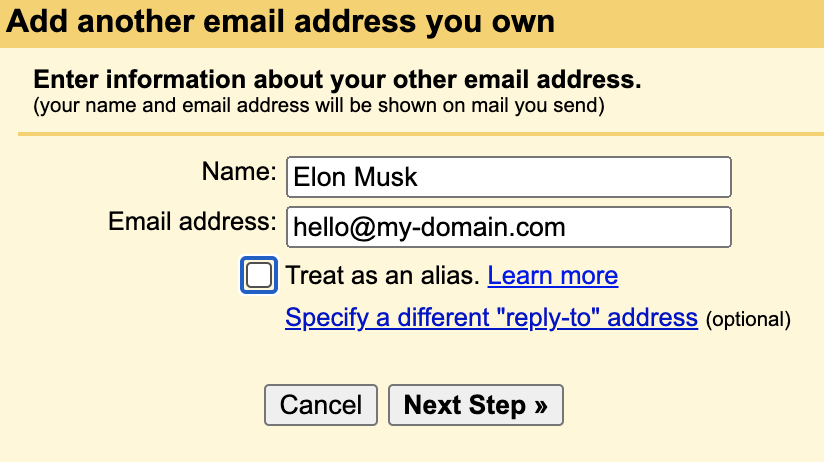 If you prefer the recipient to reply directly to your Gmail address, then leave this checked. To learn more, follow these instructions by Gmail on this topic.
 - Click Next Step to proceed.
- When prompted for SMTP Server, enter smtp.gmail.com and leave the port as 587.
- When prompted for Username, enter the portion of your Gmail address without the gmail.com part (e.g. just "user" if my email is user@gmail.com)
- When prompted for Password, paste from your clipboard the password you generated in step 2 above
- Leave the radio button checked to Secured connection using TLS.
-
Click Add Account to proceed.

- Open a new tab to Gmail and wait for your verification email to arrive (you will receive a verification code that confirms you are the owner of the email address you are attempting to "Send Mail As").
- Once it arrives, copy and paste the verification code at the prompt you received in the previous step.
- Once you've done that, go back to the email and click the link to "confirm the request". You need to do this step and the previous step for the email to be correctly configured.
That completes the steps required to start sending email as your own domain in GMail.
